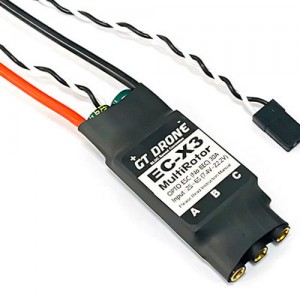
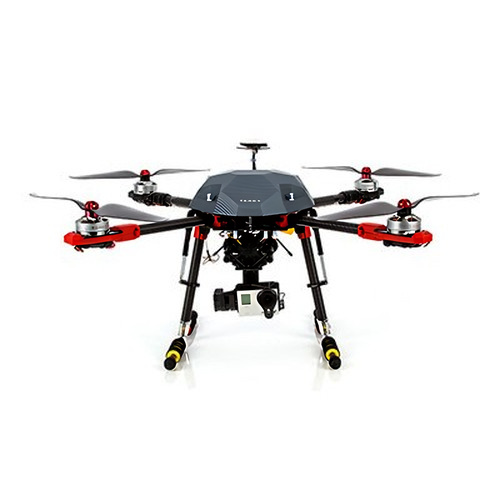
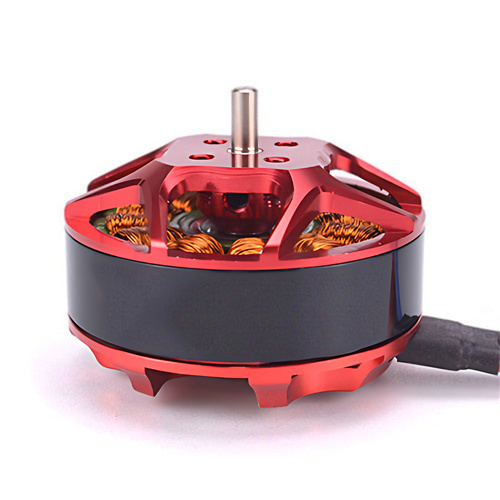
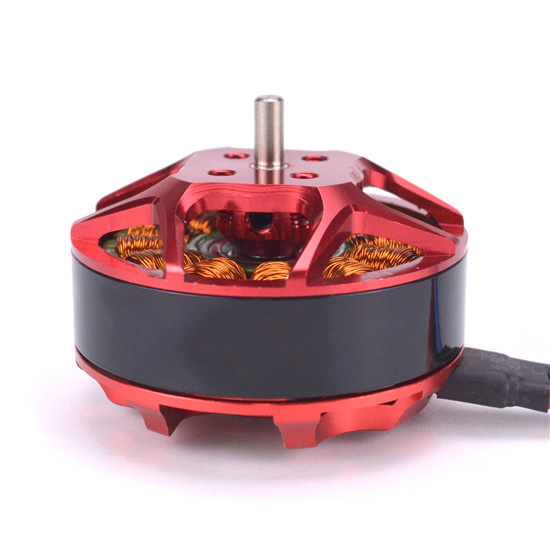
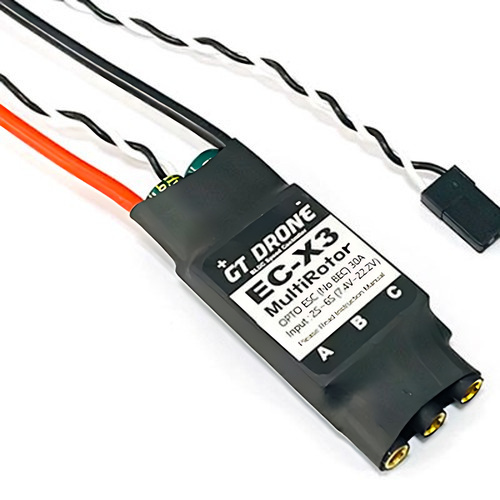
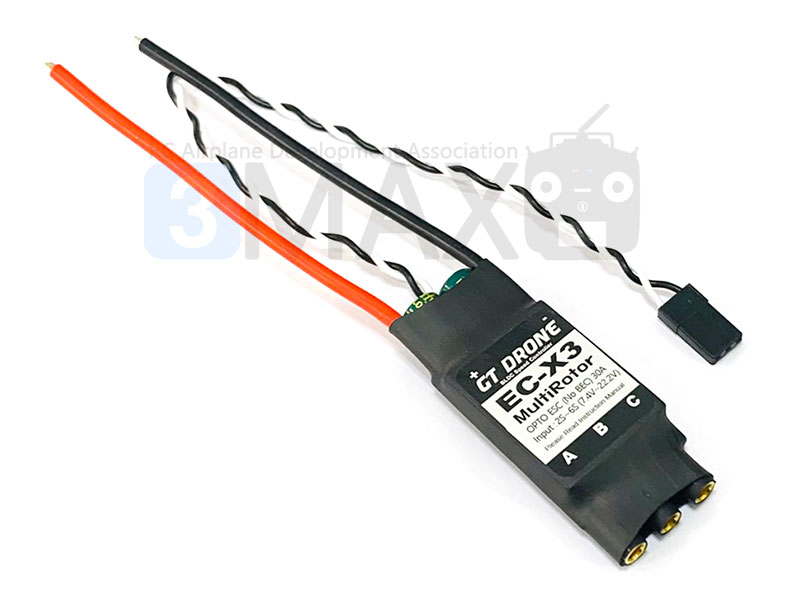
GT-Drone EC-X3 ESC for Multicopters (30A/500Hz/OPTO/COB/2S~6S)
드론용 펌웨어가 탑재된 멀티콥터용 브러쉬리스 변속기 입니다.
최저 50Hz ~ 최대 500Hz 의 Input Rate 를 지원하며, 별도의 셋팅 없이 바로 장착 후 사용이 가능합니다.
드론 전용으로 최상의 해상도를 구현하고 있으며, 7.4V ~ 22.2V (2S ~ 6S) 리튬폴리머 배터리를 사용할 수 있습니다.
450 ~ 600급 드론에 사용하기에 최적의 제품으로, BEC 가 없는 OPTO 방식입니다.
모터와 연결하기 위한 3.5mm 골드잭이 기판에 미리 부착되어 있는 COB 타입입니다. (납땜 필요 없음)
- 100% 고품질 N-FET 채용.
- 온도에 따른 PWM 스위칭 레이트에 영향를 주지 않는 고정밀 크리스탈 오실레이터 채용.
- 최대 500Hz Input Rate
- 16Khz 동작 클럭으로 대부분의 FC 및 수신기와 호환성 유지
- 스로틀 캘리브레이션 후 별도의 세팅없이 바로 사용 가능.
[ 상세 제원 ]
- 연속 전류 : 30A
- 순간 전류 : 35A (10 초 미만)
- BEC : No BEC (OPTO)
- 입력전압 : 2S(7.4V)~6S(22.2V) 지원
- 무게 : 약 23g (골드잭 포함)
- 크기 : 60x25x8mm
[ 변속기 스로틀 캘리브레이션 방법 ]
1. 조종기 스틱을 100%에 둔 후 변속기에 전원을 넣습니다.
2. 변속기 쪽에서 삐~삐~ 하는 소리가 나면 스로틀을 0%로 내립니다.
3. 변속기의 전원을 OFF 합니다.
4. 변속기 스로틀 캘리브레이션 완료
[ 변속기 프로그래밍 ]
1. 조종기의 스로틀 스틱을 100% 에 둔 후 변속기에 전원을 넣으면 프로그램을 변경할 수 있습니다.
2. 삐삐 소리 후 스로틀 내림 : 스로틀 캘리브레이션
3. 삐삐삐 소리 후 스로틀 내림 : Damped light 기능 ON/OFF (기본값은 OFF)
4. 삐삐삐삐 소리 후 스로틀 내림 : 브레이크 기능 ON/OFF (기본값은 OFF)
<제품 이미지>
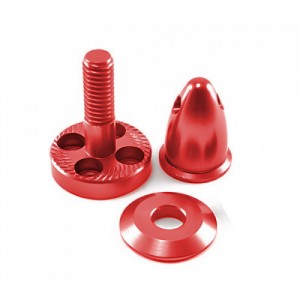
제품 구성품 4 : [DUALSKY] 12x5.5 MR 카본 프로펠러 정, 역 1조 (Version.2)
DUALSKY 12x5.5 MR Prop Version.2
Dualsky XM4005/4010 Series용 신형 카본 프롭 세트.(MR Type)
프롭 효율을 극대화하기 위해 새로운 Platform Mold를 사용, 아울러 익단 실속을 방지하기위해 Carving 방식의 EDGE 설계.
장착 방법은 아래 사진 참조
정피치/역피치 각 1Set
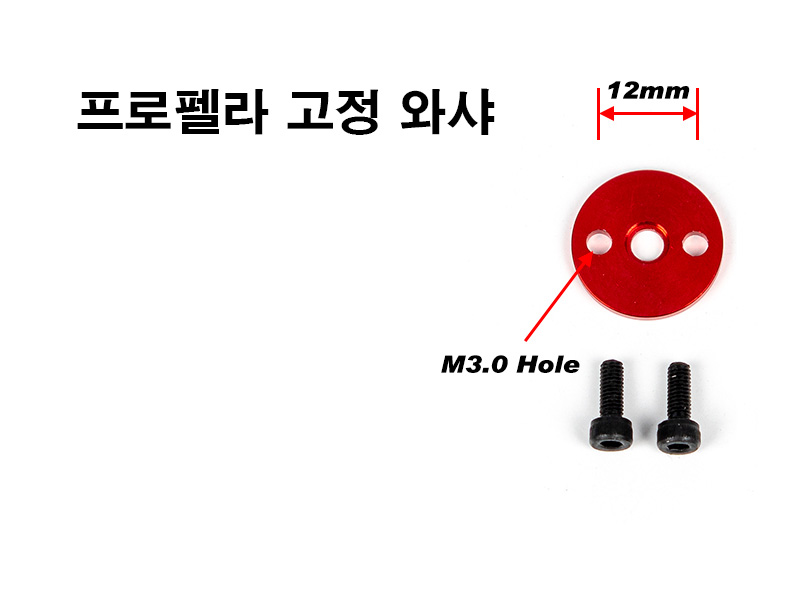
Bolt Hole 규격 : M3.0
<제 원>
규격 : 12x5.5inch
중량 : 11.4g/pcs
MR 와셔는 XM5010/5015와 공용으로 사용합니다.
<제품 장착 요령>
아래 프롭은 본 제품과는 다른 프롭입니다만, 장착 방법은 동일합니다.(18in이상 부터는 프롭 마운트의 4개 홀을 모두 고정합니다.)
1. 먼저 센터 홀에 프롭을 장착합니다. 정확하게 GC가 맞게 가공이 되어 있기 때문에 타이트하게 들어갑니다.
장착 후 프롭을 돌려서 좌우의 홀 구멍과 모터의 홀 구멍을 정렬합니다.
2. 모터에 포함된 메탈 프롭 마운트 디스크를 아래와 같이 올리고 모터에 포함된 M3x8 육각 볼트를 고정합니다.
한번에 볼트를 잠글 경우 수평각이 틀어질 수 있으므로 좌우를 번갈아 조금씩 잠궈 줍니다.
3. 장착 완료 사진
4. 실제 크기
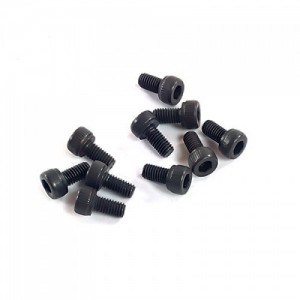
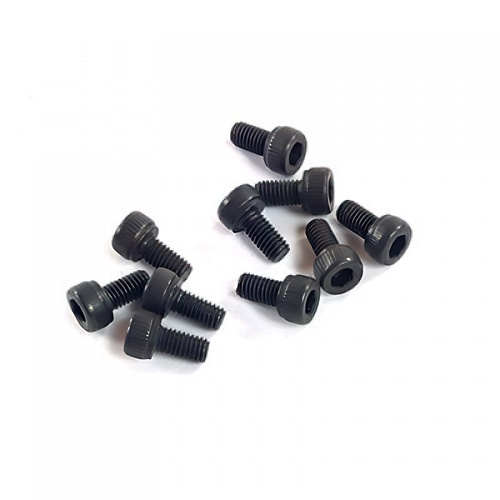
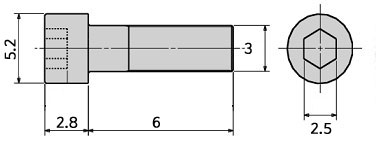
제품 구성품 5 : M3x6mm 육각 볼트 (열처리 완료, 10개입)
M3 x 6mm 규격의 볼트(나사) 입니다.
2.5mm 육각 드라이버로 풀거나 조일 수 있습니다.
중국산 저품질 제품이 아닌 국산 대한볼트입니다. 중국산 저가 제품에 비해 내구성이 향상되어 잘 마모되지 않습니다.
본 제품은 철(Steel) 재질로, 열처리 완료된 고급 사양입니다.
(스테인리스가 아니기 때문에 열처리가 되어 있어도 습기에 의해 녹이 생길 수 있습니다)
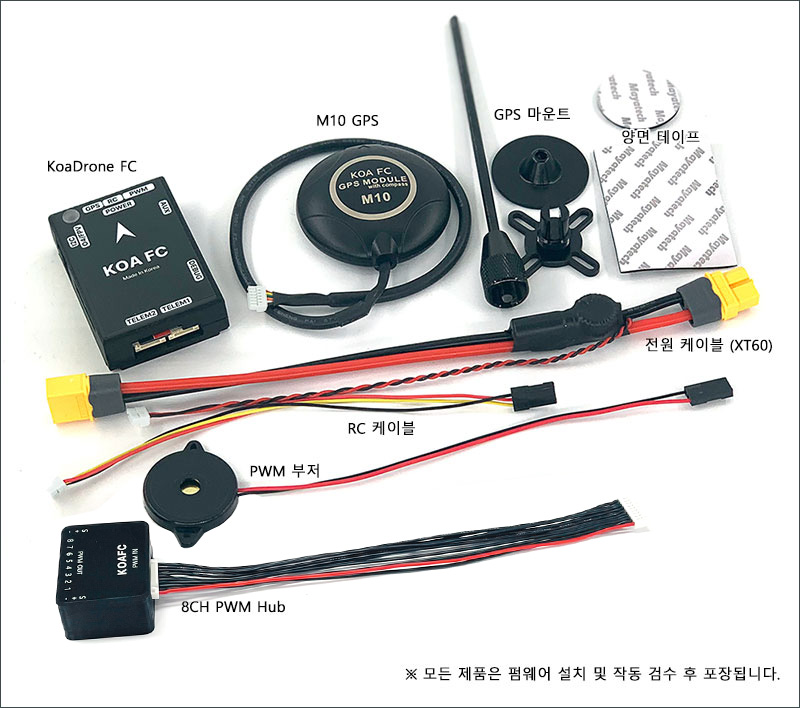
제품 구성품 6 : [KoA] 코아 FC 신형 H743 국산 범용 픽스호크 드론 비행 컨트롤러 (KC 인증) + M10 GPS 셋트
국산 비행컨트롤러인 KoA FC 와 GPS 의 셋트 상품입니다.
GPS 마운트와 각종 악세사리가 포함되어 있습니다.
MADE IN KOREA
대한민국에서 설계/생산하는 제품입니다
KC 인증번호 : R-R-fcS-KOADRONE-FC
국산 비행 컨트롤러의 새로운 대안
드론의 핵심 부품인 비행 컨트롤러는 국산 제품을 구매하기 어렵습니다. 많은 국내 드론 업체들이 자체 개발한 컨트롤러를 사용하지만, 대부분 자사 드론에 최적화되어 있어 범용성이 부족하고 별도로 판매되지도 않습니다. 물론 일부 고가 제품이 있지만, 높은 가격 때문에 접근성이 낮습니다.
이러한 상황 때문에 10년이 넘은 구형 프로세서를 사용하는 중국산 비행 컨트롤러가 여전히 대학 교육이나 기업 연구용으로 널리 쓰이고 있습니다.
KOA DRONE FC는 이러한 아쉬운 점을 해결하기 위해 탄생했습니다. 고가의 최고급 컨트롤러를 대체하기보다는, 합리적인 가격으로 구형 중국산 픽스호크를 대체하는 것이 우리의 목표입니다. 누구나 부담 없이 사용할 수 있는 국산 비행 컨트롤러를 제공하여 드론 산업 발전에 기여하고자 합니다.
합리적인 가격, 뛰어난 범용성, 그리고 편리한 확장성
KOA DRONE FC는 저렴한 가격과 뛰어난 범용성을 핵심 목표로 설계되었습니다.
특히, 사용자가 원하는 드론 소프트웨어를 자유롭게 선택할 수 있도록 ArduPilot, PX4, Betaflight, iNAV를 모두 지원합니다. 이를 통해 연구, 교육, 취미 등 다양한 분야에서 활용될 수 있는 최적의 솔루션을 제공합니다.
더 나아가, 레이싱 드론용으로 널리 사용되는 30.5mm 규격의 장착 구멍까지 적용하여 사용 편의성과 확장성을 높였습니다. 이로써 드론 종류에 구애받지 않고 누구나 손쉽게 사용할 수 있습니다.
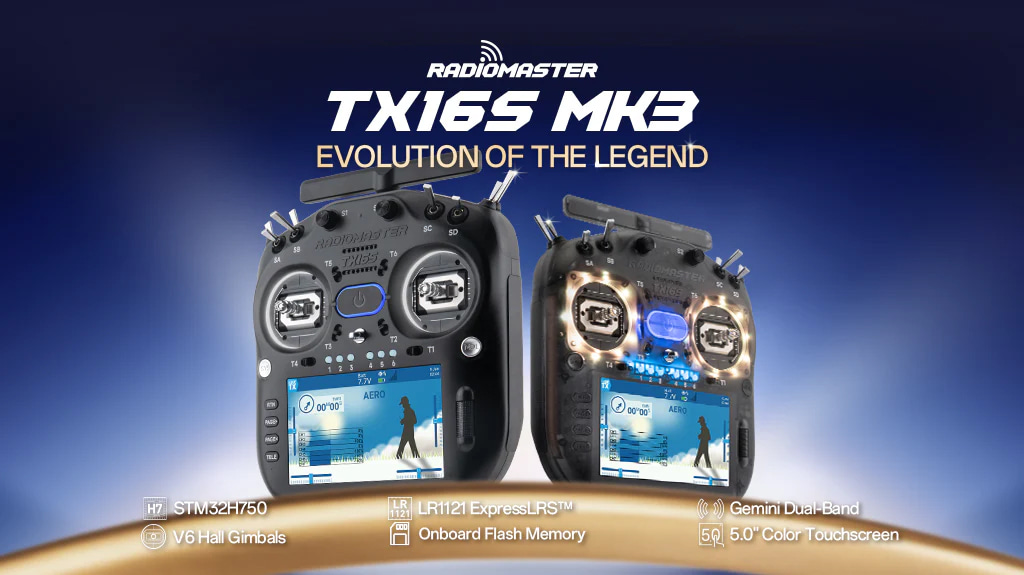
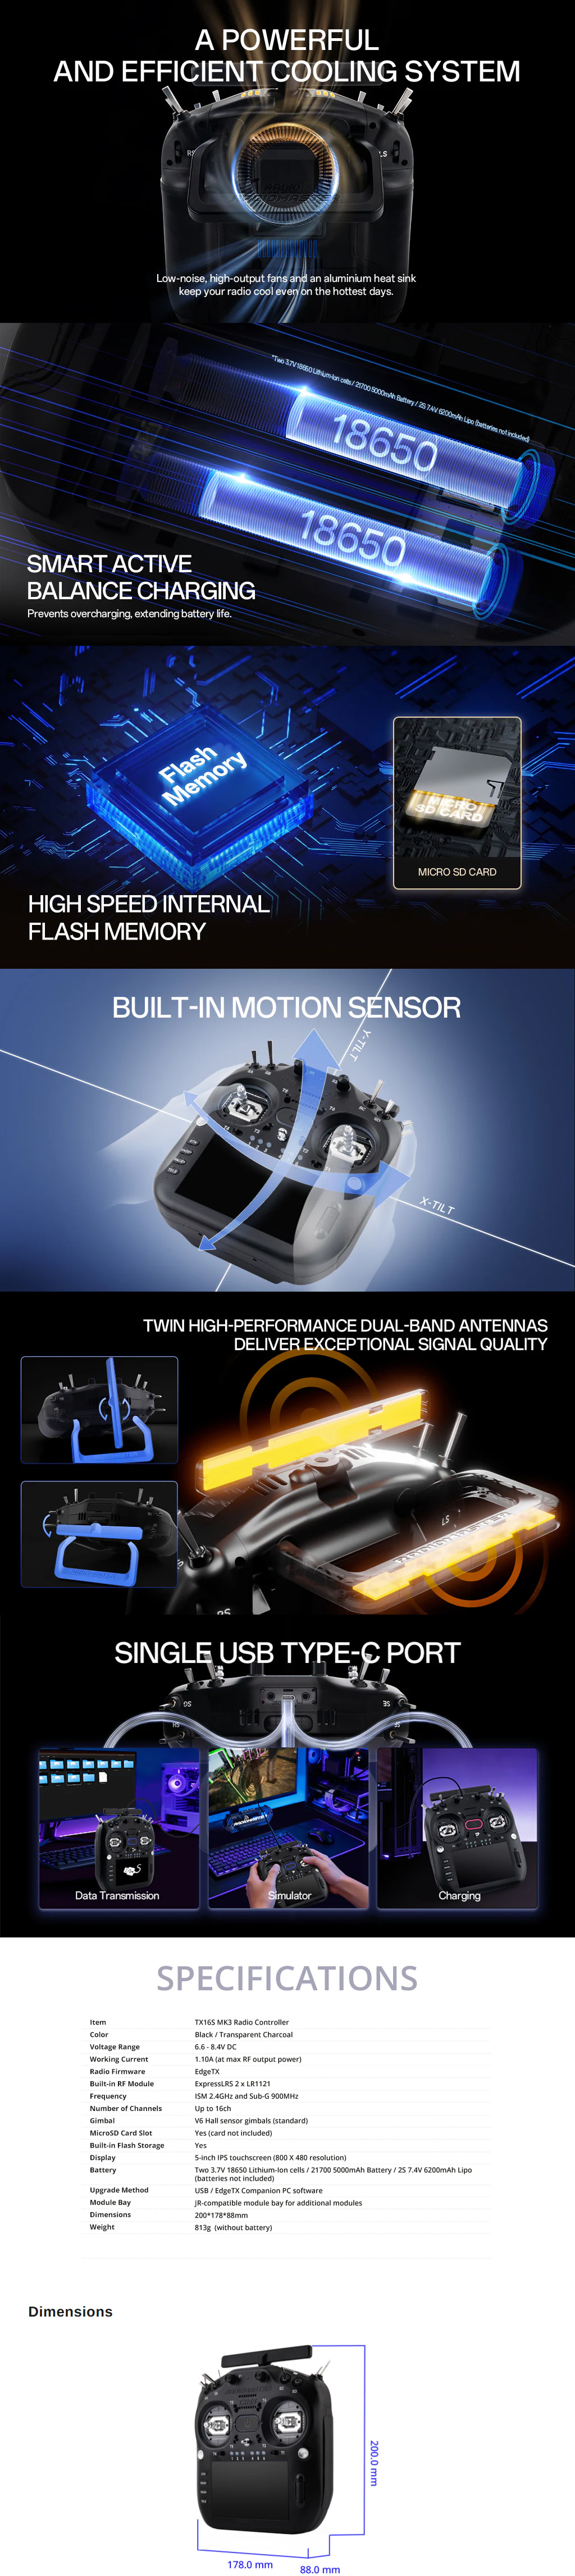
Internal RF Module : Dual-band Gemini 2.4GHz and Sub-G 900MHz
Smart Balance Battery Circuit : Maximizes battery efficiency and longevity for better battery life.
Powerful Cooling System : Low-noise, high-output fans and an aluminum heat sink keep your radio cool, even on the hottest days.
Digital audio : Greater sound quality and reduced interference.
Dual Foldable Antennas : Compact and easy to store without compromising signal strength.
Built-in Microphone : For future feature expansion.
Automatic back light adjustment : Makes the screen easier to read indoors and out.
Built-in Motion Sensor : Trigger switches, pan/tilt cameras, or telemetry callouts simply by tilting your radio.
Storage : Built-in flash memory with external SD card support.
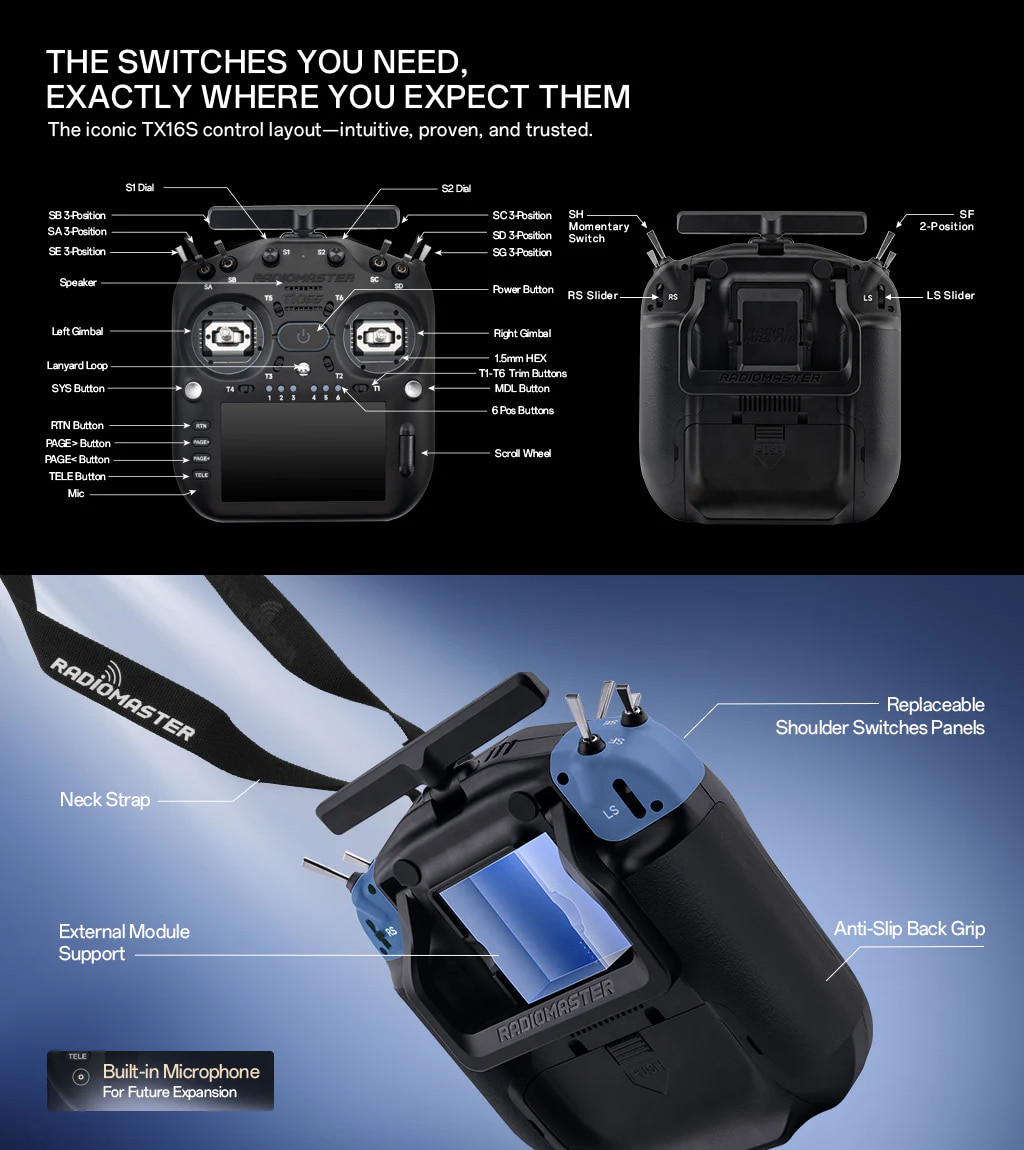
Removable shoulder switch panels : Customize your setup with modular switch panels.
Specification
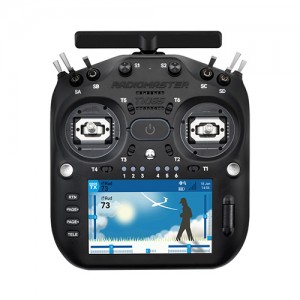
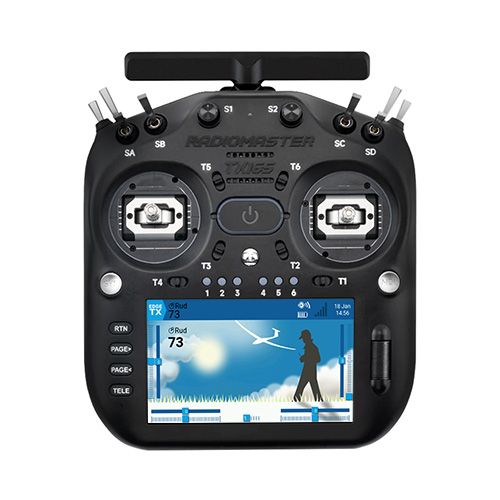
Item : TX16S MK3 Radio Controller
Color : Black / Transparent Charcoal
Voltage Range : 6.6 - 8.4V DC
Working Current : 1.10A (at max RF output power)
Radio Firmware : EdgeTX (require 3.0.0 or higher)
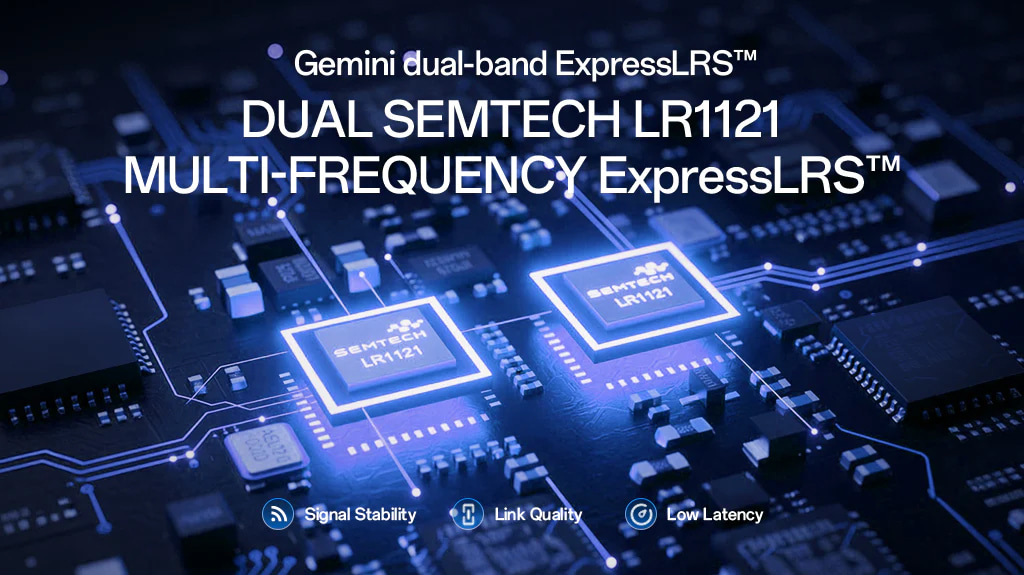
Built-in RF Module : ExpressLRS 2 x LR1121
Frequency : ISM 2.4GHz and Sub-G 900MHz
Number of Channels : Up to 16ch
Gimbal : V6 Hall sensor gimbals (standard)
MicroSD Card Slot : Yes (card not included)
Built-in Flash : Yes
Display : 5-inch IPS touchscreen (800 X 480 resolution)
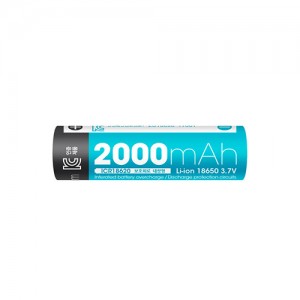
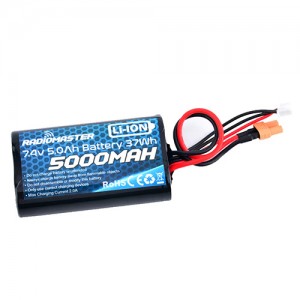
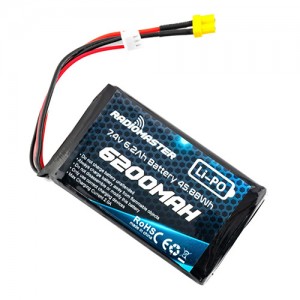
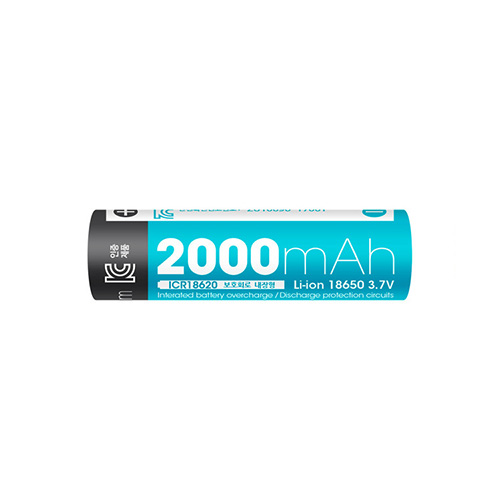
Battery : Two 3.7V 18650 Lithium-Ion cells / 21700 Li-ion 5000mAh Battery / 2S 7.4V 6200mAh Lipo (batteries not included)
Upgrade Method : USB / EdgeTX Companion PC software
Module Bay : JR-compatible module bay for additional modules
Dimensions : 200*178*88mm
Weight : 813g (without battery)
Powered by the advanced STM32H7 processor, it offers lightning-fast performance, smooth operation, and instant responsiveness.
The bright 5-inch 480×800 IPS touchscreen provides a sharp, sunlight-readable interface for easy navigation and programming.
Featuring the Gemini-X dual-band ExpressLRS system with dual LR1121 transceivers, the TX16S MK3 ensures ultra-reliable,
low-latency control across both 2.4GHz and 900MHz bands, providing exceptional signal stability and link quality.
The TX16S MK3 Standard features new V6 quad-bearing Hall-Effect gimbals, using the same high-performance chipset found in the AG02 for improved precision and stability.
External adjustments for travel, centering, and tension let you fine-tune the feel exactly to your preference.
Programmable LED gimbal light rings add a new layer of customization and function, allowing pilots to assign visual indicators for modes,
warnings, or status cues while giving the radio a distinctive, personalized look.
A full-size powerhouse built around the classic, proven TX16S layout—trusted by pilots worldwide.
Every switch, slider, and potentiometer is exactly where it belongs, delivering complete control without compromise.
Modular switch panels allow personalized configurations to match any flying style.
Every aspect of the TX16S MK3 demonstrates thoughtful evolution—powerful, ergonomic, and built for pilots who expect nothing but excellence.
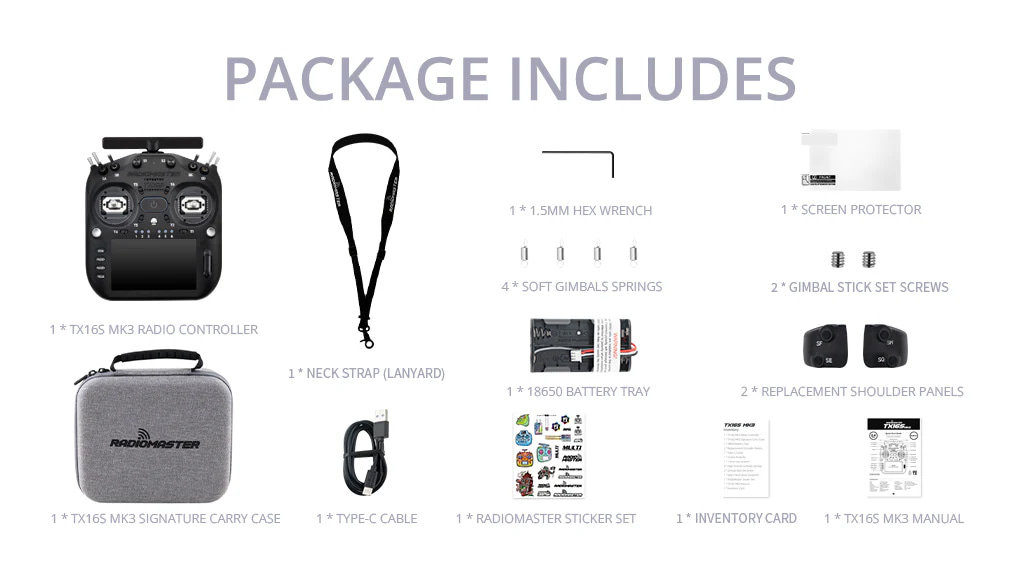
Package Includes
1 * TX16S MK3 Radio Controller
1 * TX16S MK3 Signature Carry Case
1 * 18650 Battery Tray
2 * Replacement Shoulder Panels
1 * Type-C Cable
1 * Screen Protector
1 * 1.5mm Hex Wrench
4 * Low Tension Gimbals Springs
2 * Gimbal Stick Set Screws
1 * Nylon Neck Strap (Lanyard)
1 * RadioMaster Sticker Set
1 * TX16S MK3 Manual
1 * Inventory Card
<모드 변경 방법>
TX16S MK3 is installed with ExpressLRS as standard.
ExpressLRS is an open-source, high-performance radio control link that delivers exceptional range and low-latency communication using advanced LoRa technology.
It's highly customizable and perfect for RC enthusiasts looking for reliability and efficiency.
Pair your ExpressLRS with Radiomaster's top-tier transmitters and receivers.
Radiomaster products are designed to maximize the benefits of ExpressLRS, offering state-of-the-art performance for your RC adventures.
Upgrade your RC experience with the unbeatable combination of ExpressLRS and Radiomaster—engineered for excellence and tailored for you.
TX16S MK3 is now compatible with mLRS! The mLRS project offers an open-source, high-performance radio system based on LoRa technology, operating at 2.4 GHz, 915/868 MHz,
and 433 MHz/70 cm, designed to deliver a secure, reliable, and robust link under any conditions.
mLRS is designed with MAVLink and MSP optimization in mind, while also providing a transparent serial link, making it suitable for a wide range of applications.
Its design ensures the strongest possible signal integrity while maintaining a relatively high data rate, balancing performance and reliability without compromise.
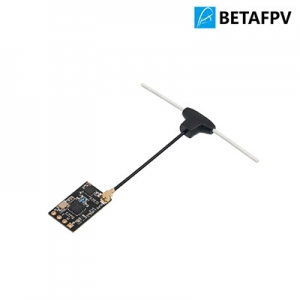
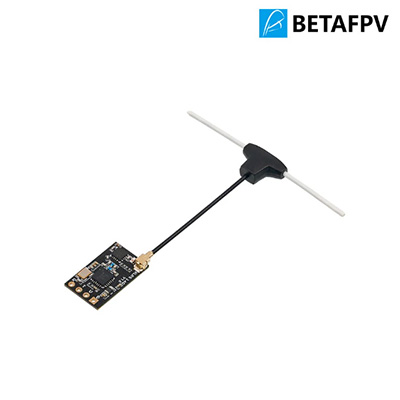
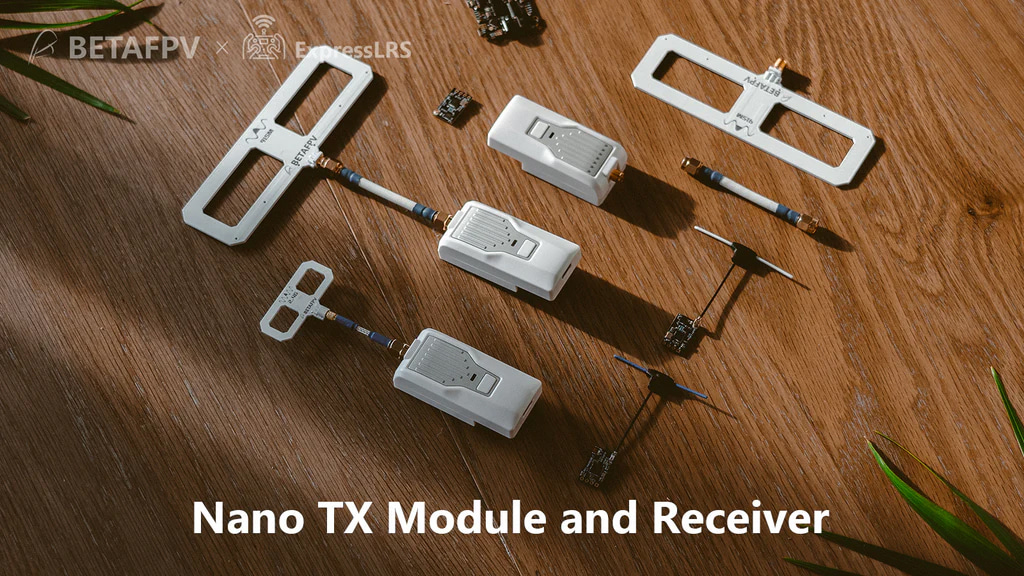
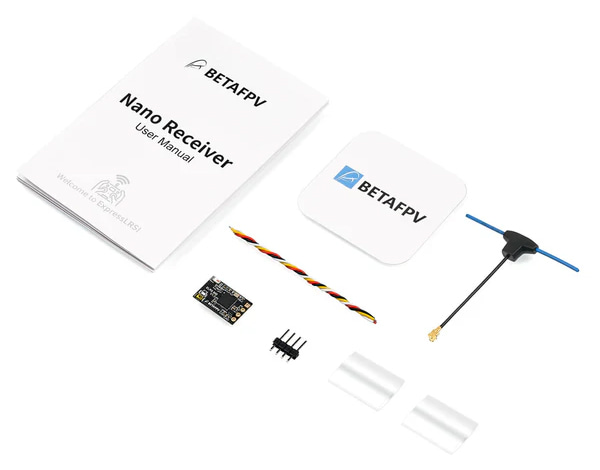
BETAFPV Nano receiver is based on the ExpressLRS project, an open-source RC link for RC applications.
ExpressLRS aims to achieve the best possible link performance in both speeds, latency, and range.
This makes ExpressLRS one of the fastest RC links available while still offering long-range performance.
Specification Weight : 0.7g (receiver only) Size : 12mm*19mm Telemetry power : 20dbm (100mW, 2.4G Version) Frequency bands (Nano receiver 2.4G version) : 2.4GHz ISM Frequency bands (Nano receiver 915MHz/868MHz version) : 915MHz FCC/868MHz EU Input voltage : 5V Antenna connector : IPEX MHF
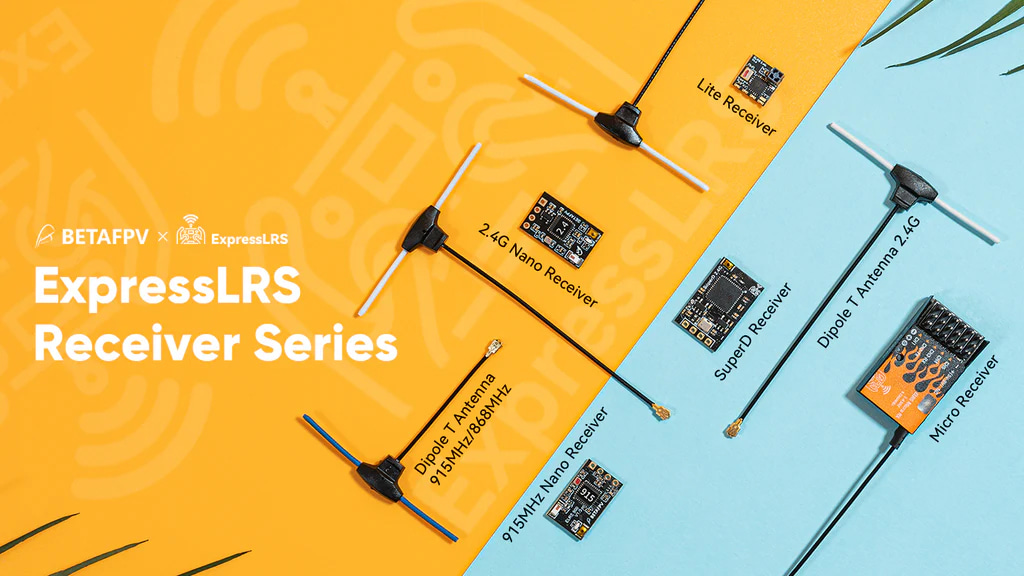
BETAFPV ExpressLRS Receivers Choosing a suitable receiver to fly quadcopter or other RC models is very important. BETAFPV ExpressLRS Receivers including ELRS Lite, Nano, Micro, and the newest SuperD, greatly fulfill pilots' requirements for FPV flying.
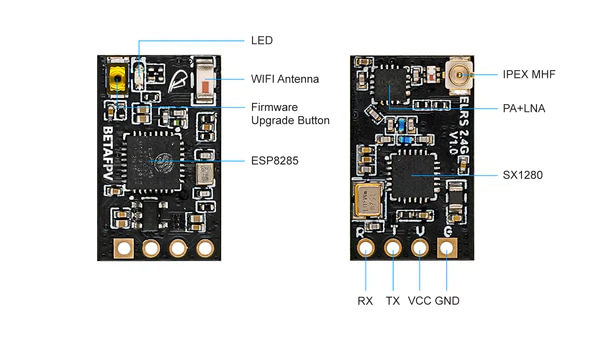
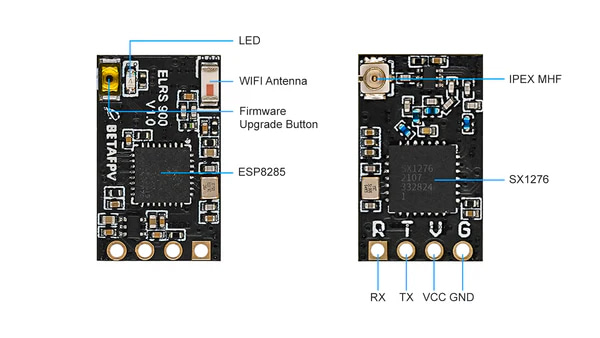
Diagram Nano receiver 2.4G version diagram as shown below. Nano receiver 868MHz/915MHz version diagram as shown below.Note : Now the firmware version of the Nano receiver and module manufactured by our company is ELRS 3.3.0.; ELRS Innovative team has officially released version 1.0.0, based on the version, we have some updates:
2.4G Nano TX Module supports 500Hz refresh rate;
Short press the button on the Nano module 3 times to get into the binding status.
We suggest our customers upgrade their modules and receivers' ELRS version to 3.3.0. Significantly, the module and receiver have to be in the same ELRS version, otherwise, the frequency cannot match successfully.
Know More About ExpressLRS ExpressLRS is an open-source RC link for RC applications. Everyone could find this project on Github or join the discussion in Facebook Group.
ExpressLRS is based on Semtech Lora SX127x or SX1280 hardware for RX and TX respectively. it aims to achieve the best possible link performance in both speeds, latency, and range. At 900 MHz a maximum of 200 Hz packet rate is supported. At 2.4 GHz a blistering 500Hz is currently supported with a custom OpenTX build. This makes ExpressLRS one of the fastest RC links available while still offering long-range performance.
More and more vendors start to support the ExpressLRS radio protocol in different parts, like radio transmitter with ELRS in stock, drone with built-in ELRS receiver, ELRS TX module for JR bay, or Nano bay. BETAFPV team take part in this project and provide a series of ExpressLRS components.
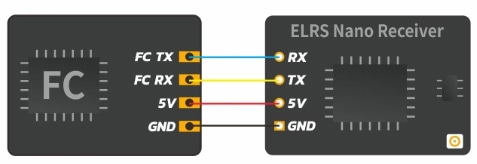
Configuration & Bind ExpressLRS uses the Crossfire serial protocol (AKA CRSF protocol) to communicate between the receiver and the flight controller board. So make sure your flight controller board supports the CRSF serial protocol. Next, we use the flight controller with Betaflight firmware to show how to set up the CRSF protocol.
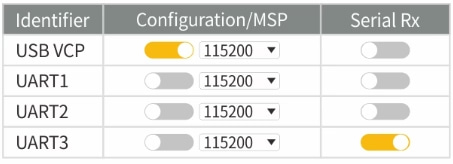
The connection between the ELRS Nano receiver and the FC board is shown below. Enable the corresponding UART (e.g. UART3 below) as a Serial Rx on Betaflight Configurator "Ports" tab.
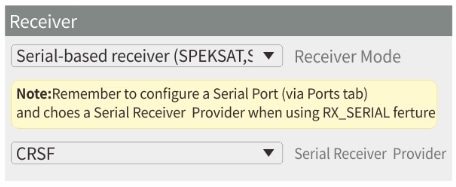
On the "Configuration" tab, select "Serial-based receiver" on the "Receiver" panel, and select "CRSF" as the protocol. Telemetry is optional here and will reduce your stick update rate due to those transmit slots being used for telemetry. Nano receiver could enter binding status by power on/off three times.
Plugin and unplug nano receiver three times;
Make sure the LED is doing a quick double blink, which indicates the receiver is in bind mode;
Make sure the RF TX module or radio transmitter enter binding status, which sends out a binding pulse;
If the receiver has a solid light, it's bound.
Note: Binding once and the receiver will store the binding information. Re-power and the connect successfully auto.
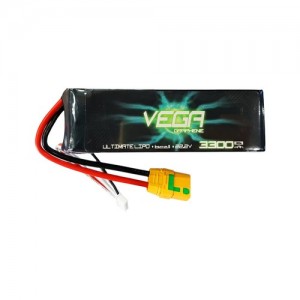
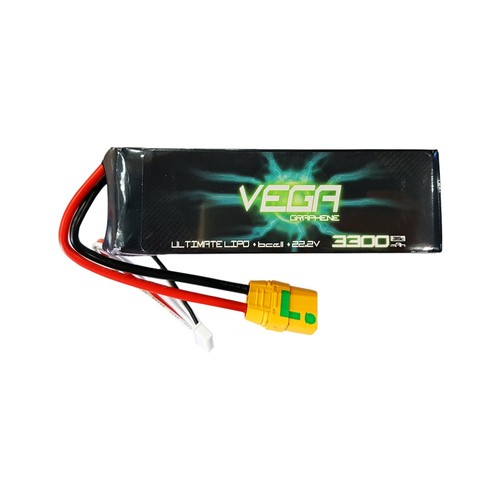
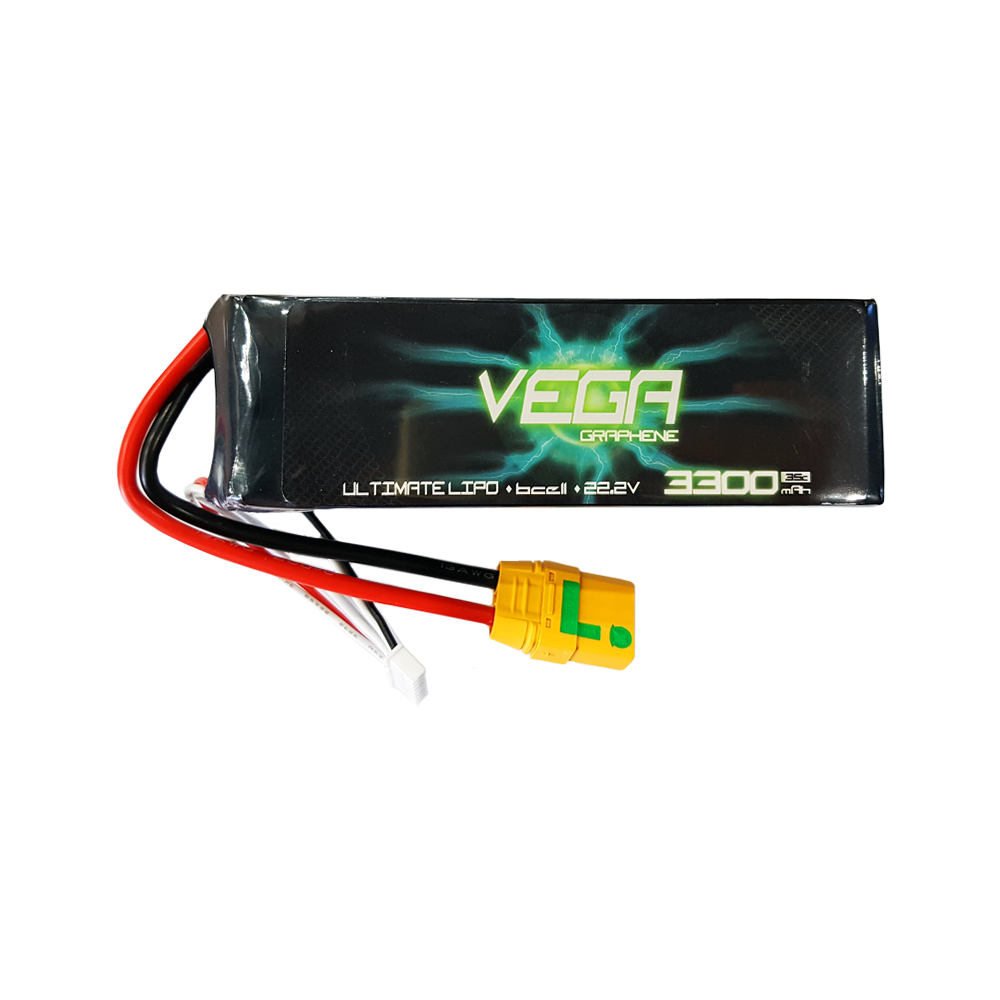
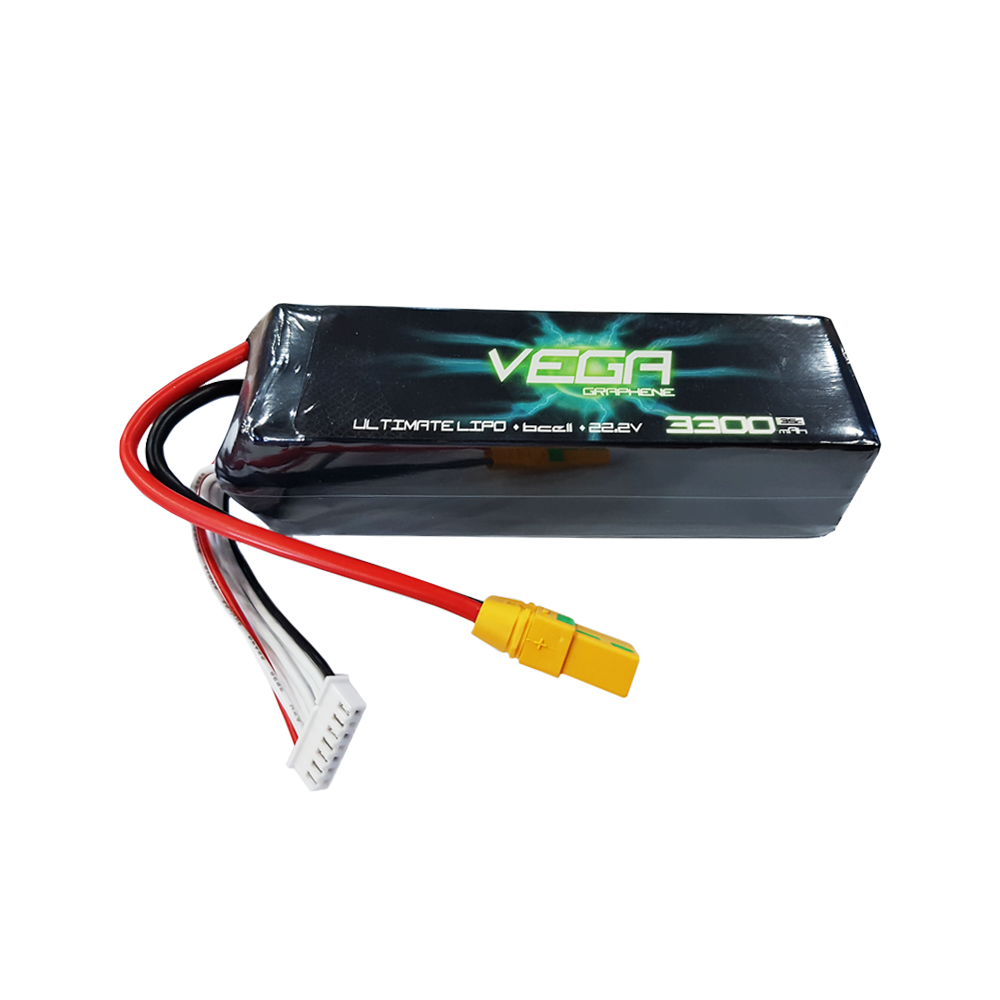
제품 구성품 10 : VEGA 베가 그래핀 6셀 22.2V 3300mAh 35C 리튬폴리머 배터리 - XT90 안티스파크
VEGA 3300mAh 6S 35C Battery
- 새로운 프리미엄 배터리 브랜드 ‘VEGA’입니다.
- 내부 안전성 테스트 및 각종 비행 테스트에서 우수한 성능을 검증받은 제품입니다.
- 고급 그래핀 셀을 사용한 배터리로, 전압 유지, 발란스 유지, 충전 등의 부분에서 뛰어난 퍼포먼스를 보여주는 배터리입니다.
- 드론 및 무선모형 용도에 최적화된 배터리로 최상의 성능을 느껴보십시오.
XT90S 커넥터입니다.
구성
배터리 1개
사이즈 135x42x42mm
무게 520g
<리튬폴리머 배터리 불량 판단 법> - 리튬폴리머 배터리는 여러개의 셀로 구성되어 있습니다. - 4셀이면, 배터리 내부에 4개의 셀이 직렬로 연결되어 있는 구조입니다. - 각 셀 당 공칭전압은 3.7V입니다. 완전 충전시 4.2V입니다. - 새 배터리는 안전을 위해 보통 3.7V 근방까지만 충전되어 있습니다. - 각 셀당 전압이 일정해야 합니다. 예를 들어 4셀 배터리인 경우 전압이 다음과 같이 나온다면 불량입니다. EX) 1번 셀 :3.85V, 2번 셀 :3.81V, 3번 셀 :3.91, 4번 셀 :3.25V - 1~3번 셀 까지는 양호한데 4번 셀의 전압이 너무 낮습니다.0.1V정도 차이는 괜찮습니다. - 물론 비슷할수록 좋은 배터리입니다. 이건 복불복 경향이 있습니다. - 셀 당 전압은 셀체커기로 측정할 수 있습니다. 셀체커기는 필수입니다. - 전체 전압은 크게 중요하지 않습니다. 4개의 셀이 약간 낮은 전압으로 일정할 수도 있고, 약간 높은 전압으로 일정할 수도 있습니다. 모두 정상입니다. 중요한건 일정하다는 것입니다. - 여기까지 합격했다면 충전해보세요. 충전 후에도 전압이 일정해야 합니다. - 보통 4.17V 근방까지 충전됩니다. 4.2V까지 완전히 충전되는건 상당히 좋은 충전기 입니다. <필독!! 리튬폴리머 배터리 사용시 주의 사항>
- 새 배터리는 반드시 충전 후 사용하셔야합니다. - 반드시 용량의 70%까지만 사용하셔야 합니다. - 셀당 전압이 3.3V 이하가 되면 셀이 손상되며, 심할 경우 충전이 불가합니다. - 완전 충전한 상태로 뜨거운 곳(ex.여름철 차량안)에 보관하면, 배터리가 부풀고 폭발할 가능성이 있습니다. - 반드시 리튬폴리머 전용 충전기로 충전하셔야 합니다. 과충전시 폭발의 위험이 있습니다. - 특별한 안내가 없는 한밸런스 충전하십시오. - 리튬배터리는 셀 당 전압 차이가 0.1V 내외여야합니다. 셀체커기로 항상 체크하면서 관리하십시오. - 셀 밸런스가 어긋났을때 일반 충전을 하면, 일부 셀의 과충전으로 배터리가 폭발할 가능성이 있습니다. - 안전을 위해 충전시 배터리를 항상 지켜보십시오. - 특히 충전 중에 주무시면 절대 안됩니다. - 임의로 분해하시면 안됩니다. 위험합니다. 리튬폴리머는 상당히 위험하고 까다로운 배터리입니다. 단 한번의 실수에도 배터리가 부풀거나 충전이 불가 할 수 있습니다. 상기의 주의사항을 숙지하지 않으시고 발생하는 모든 일에 대해서 당사는 책임 지지 않습니다.
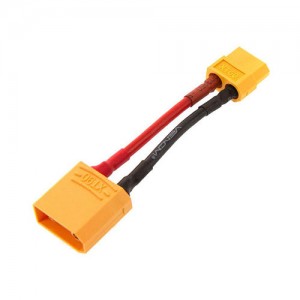
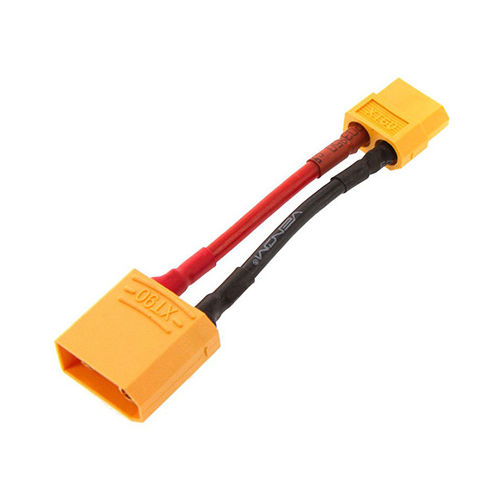
제품 구성품 11 : XT90잭 (배터리) -> XT60잭(기체) 변환잭
아래 이미지는 커넥터 방향 이해를 돕기 위한 이미지입니다.
실제 상품은 커넥터 하우징 없이 수축튜브 처리되어있습니다.
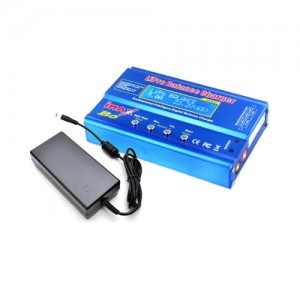
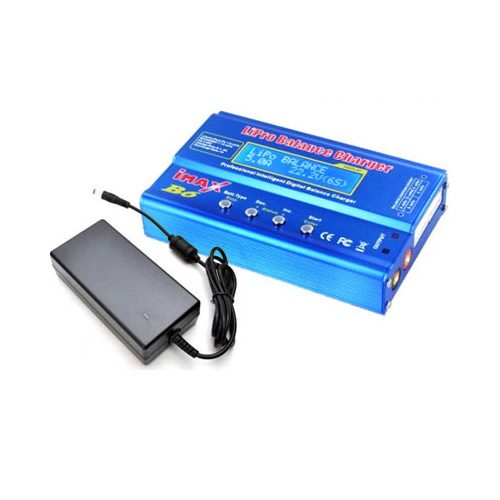
제품 구성품 12 : [IMAX] KC인증 정품 아이맥스 B6 디지털 충전기 + 12V 7.5A 90W 파워 서플라이 포함
아이맥스 B6 디지털 충전기 IMAX
RC용으로 사용되는 리튬배터리(리튬폴리머/Li-Poly, 하이볼테이지/HV, 리튬철/Li-Fe, 리튬이온/Li-Ion) 배터리 및 니켈수소(Ni-MH), 니카드(Ni-Cd) 뿐만 아니라 12v 납축배터리(Pb)까지 충전이 가능한 범용 디지털 충전기입니다.
각 배터리에 대해 최대 5A 의 충전 및 1A 방전을 지원하며, 대부분의 배터리에 바로 사용이 가능하게끔 딘스, JST, 부스터, 수신기, 악어잭이 포함되어 있습니다.
야외에서 사용시 승용차량의 보넷 내부 12v 납축배터리에 연결하여 사용할 수 있으며, 실내에서 사용시에는 12v 5A 이상의 파워서플라이에 연결하여 사용할 수 있습니다. (파워서플라이는 포함.)
* 본 충전기는 80W 소형 충전기로서 대용량 Li-Po 배터리 충전용으로는 부적합 합니다.
[ 상세 사양 ] - LCD 디스플레이 모니터 - 입력 전압 : DC 12V - 출력 파워 : 최대 80W - 충전 전류 : 0.1~5.0A - 밸런싱 전류(리튬) : 300mAh/Cell - 니카드(NiCd)/니켈수소(NiMh) 배터리 지원 셀 수 : 1~15셀 - 리튬(Li-Po/Li-ion/Li-Fe/Li-HV) 지원 셀 수 : 1~6셀 - 납축 배터리 지원 전압 : 2V ~ 50V
- 충전 완료시 알람음 알림 - 무게 : 450g - 크기 : 137 x 87 x 33mm
[ 프로그램 ]
- 리튬 배터리 일반 충전
- 리튬 배터리 밸런싱 충전
- 리튬 배터리 빠른 밸런싱(FAST MODE) 충전 : 99% 까지 빠른속도로 충전하는 모드
- 리튬 배터리 장기보관 충전 : 각 셀당 전압을 3.8v 로 통일시켜 1개월 이상 장기보관을 위한 모드
- 리튬 배터리 방전
- 니켈수소, 니카드 배터리 일반/급속 충전
- 니켈수소, 니카드 배터리 방전
- 니켈수소, 니카드 배터리 리싸이클
- 납축 배터리 충전/방전
- 데이터 저장
[ 충전 오류 알림 ]
- REVERSE POLARITY : 역전류 경고
- CONNECTION BREAK : 배터리 연결 안됨
- SHORT ERR : 쇼트 에러
- INPUT VOL ERR : 입력 전압 저하
- VOL SELECT ERR : 배터리 전압 설정 오류
- BREAK DOWN : 충전 오류
- BATTERY CHECK LOW VOLTAGE : 리튬 배터리 저전압 경고
- BATTERY CHECK HIGH VOLTAGE : 배터리 고전압 경고
- BATTERY VOLTAGE CELL LOW VOL : 특정 셀 저전압 경고
- BATTERY VOLTAGE CELL HIGH VOL : 특정 셀 고전압 경고
- TEMP OVER ERR : 충전기 과열 경고, 충전기를 식혀주십시오!
[ 제품 구성 ]
- B6 디지털 충전기
- 딘스 충전 케이블
- JST 충전 케이블
- 부스터 충전 케이블
- 수신기 배터리(후타바) 충전 케이블
- 입력용 악어잭
- 12V 7.5A (90W) 파워 서플라이
충전기 전면부에 대형 LCD 액정 디스플레이와 4개의 스위치가 있습니다.
LCD 액정 디스플레이를 통해 충전상황을 확인할 수 있으며,
특히 리튬 배터리 충전시 각 셀당 전압의 밸런스 상황을 직접 눈으로 실시간 확인할 수 있습니다.
전면부의 Batt Type(Stop), Dec(◀), Inc(▶), Start(Enter) 스위치를 이용하여 배터리 종류와 전압, 전류등을 설정할 수 있습니다.